The Online
Ball Simulator

Set the physics, pick a container, press record. A browser-based bouncing ball simulator built for people making short-form video, not for people studying rigid body dynamics.

Build Faceless Channels
Runs In Your Browser
Maximize Audience Retention
Spawner Mode - Satisfying Ball Multiplyer | Fun Circle Games
Simulation modes
8
Export frame rate
60fps
Maximum resolution
4K
Native vertical canvas
9:16

Grow Your Audience
With Ball Simulator

A ball simulator is only useful if the run it produces holds attention. The controls here map to the things that actually change how a clip performs: how fast the ball accelerates, how many balls are on screen at once, how tight the container is, and what the collisions sound like.

Direct Physics Control

Gravity, bounciness, bounce randomness and ball weight are plain numeric fields. Change one, watch the run change immediately.

Speed That Escalates

Set a starting speed and a build-up rate so a run gets faster as it plays. This is what keeps a loop watchable past the first few seconds.

Balls That Multiply

Spawner rules let one ball become hundreds on wall contact, with caps on population so the frame stays readable.

Saved Configurations

Store a look you like and reload it later. Consistency across uploads matters more for a channel than any single clip.

Satisfying physics video loop

How to make a bouncing ball video

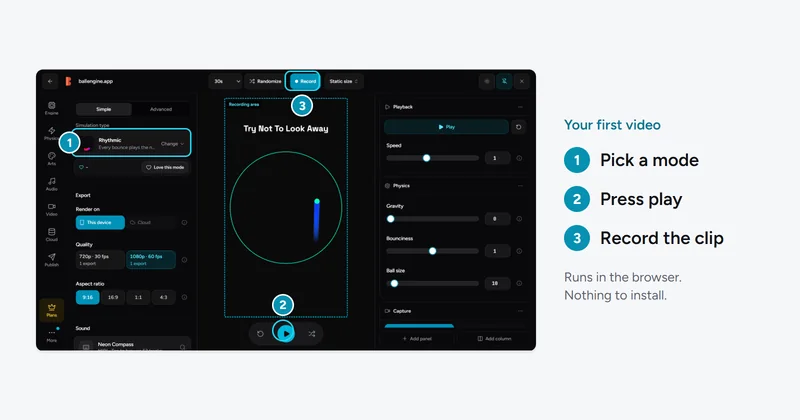
A first export takes a few minutes. These are the steps in the order the studio presents them.

  1. 1

    Pick a simulation mode

    Start from Spawner if you want balls to multiply, or Escape if you want a single ball working its way out of rotating rings. The mode sets which rules are active before you touch anything else.

  2. 2

    Set the container

    Choose the arena shape and its starting size. A tighter arena produces more collisions per second, which reads as more energetic but also more chaotic.

  3. 3

    Tune gravity and bounciness

    Gravity runs from 0 to 0.5 and bounciness from 0 to 2.0. Values above 1.0 add energy on every impact, so the run accelerates on its own without any speed settings.

  4. 4

    Add sound

    Attach a MIDI file or a song and each collision advances to the next note. Silent physics clips underperform against the same clip with audio mapped to impacts.

  5. 5

    Record and export

    Render to a vertical 9:16 file at up to 4K. The export runs off the main thread, so the preview stays responsive while it works.

Settings Reference

Every control below is a real field in the studio panel for this mode, with the range it accepts.

Core physics

ControlRangeWhat It Changes
Gravity0 to 0.5Downward acceleration per frame. Zero produces a weightless run where balls travel in straight lines between impacts.
Bounciness0 to 2.0Restitution. Below 1.0 the run loses energy and settles; above 1.0 it gains energy on every contact.
Bounce Randomness0 to 1.0Jitter added to the reflection angle so repeated collisions do not fall into a visible loop.
Ball Weight0.1 to 10Mass used in collision response. Heavier balls displace lighter ones instead of deflecting off them.
Starting Arena Size10 to 800Radius of the container at frame zero.

Speed and growth

ControlRangeWhat It Changes
Starting Speed0 to 5.0Initial velocity applied when the run begins.
Speed Build-up Rate0 to 0.1How quickly velocity climbs over the run. The main lever for making a clip escalate.
Maximum Speed Limit0 to 200Hard ceiling. Without one, a high build-up rate eventually moves balls further than one frame can render smoothly.
Size Growth Rate0 to 2.0Ball radius increase per second, for runs where the ball outgrows its container.
Maximum Ball Size5 to 1000Ceiling for growth runs. Reaching it can trigger a break effect.

Multiplication

ControlRangeWhat It Changes
Genesis Count1 to 100How many balls the run opens with.
Max Population1 to 5000Upper bound on concurrent balls. Past roughly 1,500 the frame reads as texture rather than individual objects.
Spawn Amount1 to 50New balls created per qualifying collision.
Spread Angle0 to 360Arc the new balls are emitted into.
Spawn Gap10 to 5000 msCooldown between spawn events, which stops a single frame producing a population explosion.

Why Creators Choose Ball Simulator

Most bouncing ball tools are physics demos with a record button bolted on. This one is built the other way round, starting from what a short-form clip needs and exposing the physics that changes it.

Escalation Is Built In

Speed build-up, size growth and population caps exist as first-class settings because a run that stays at one intensity loses viewers partway through.

Audio Mapped To Impacts

Collisions drive note playback from a MIDI file or a song, so the sound is generated by the simulation rather than laid over it in an editor.

Vertical By Default

The canvas is 9:16 from the start. No cropping step, no letterboxing, no reframing a square render for a phone.

Nothing To Install

It runs in the browser on WebGL. There is a desktop build if you want one, but it is not required to export a finished video.

Repeatable Output

Save a configuration and reload it. The same settings produce the same run, which is what makes a recognisable channel style possible.

Eight Distinct Modes

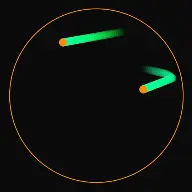
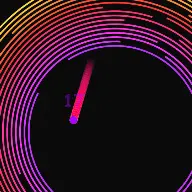
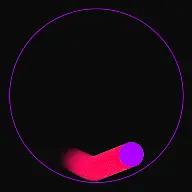
Spawner, escape, rhythmic, breaker, drawer, trail, ghost escape and spiral each change the underlying rules, not just the colours.

Popular Channels & Formats

Satisfying Loop Channels

Short vertical clips posted on a schedule, where the appeal is the motion itself rather than a narrative.

Long-Form Compilations

Several runs stitched into a longer YouTube video for background or study viewing.

Music Visualisers

A song driven through the collision system so the simulation performs the track instead of accompanying it.

Example Ball Simulator Renders

Satisfying physics video loop

Spawner Mode - Satisfying Ball Multiplyer | Fun Circle Games

What a ball simulator actually needs to do

The physics part of a bouncing ball simulator is not difficult. Reflecting a velocity vector off a surface and applying a constant downward acceleration covers most of it, and a competent developer can build that in an afternoon. This is why there are so many free bouncing ball demos online and why almost none of them are useful for making video.

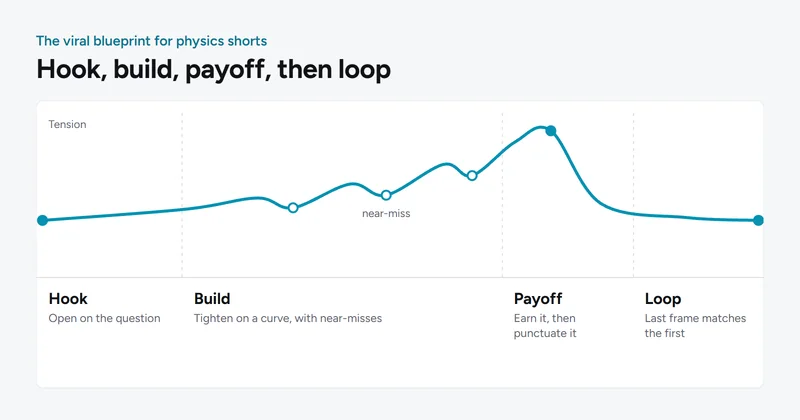
The hard part is control. A clip that holds attention needs the run to change over its duration, needs the collisions to line up with audio, and needs to end at a definite moment rather than trailing off. Those requirements are what separate a simulator you can publish from a simulator you can watch.

That is the gap this tool is built to close. Gravity and bounciness are exposed because they set the character of the motion, but so are speed build-up rate, population ceilings, size growth curves and note mapping, because those are what determine whether a finished export is worth uploading.
Choosing gravity and bounciness together

These two settings interact more than any other pair. Bounciness is restitution, the fraction of speed retained through a collision. At exactly 1.0 a ball returns to the same height every time. Below that it settles toward the floor of the container. Above it, the ball gains energy on every contact and the run accelerates without you setting any speed values at all.

Gravity determines how quickly the ball returns to a surface, which sets the collision rate. High gravity with low bounciness gives a fast, tight, percussive run. Low gravity with high bounciness gives long floating arcs with widely spaced impacts. If you are syncing to music, the collision rate is effectively your tempo, so it is worth setting gravity before you attach the audio.

A practical starting point for a music-synced run is gravity near the middle of its range with bounciness just under 1.0, then raising bounce randomness slightly so repeated impacts do not settle into an obvious repeating pattern.

Why population caps matter more than they look

Spawner runs are the format most associated with bouncing ball video, and the instinct is to let the count climb as high as the hardware allows. In practice the frame stops reading as individual balls somewhere around 1,500 concurrent objects. Past that point you are rendering texture, and the viewer loses the thing that made the format interesting, which is watching a countable number of objects become an uncountable one.

Max Population and Spawn Gap are the two controls that shape this. The cap sets where the run plateaus, and the gap stops one busy frame from producing a population explosion that skips the interesting middle section entirely. Setting both deliberately is usually the difference between a run that builds and a run that simply fills.

Frequently Asked Questions

To start, open the Creator Studio and choose the Spawner or Escape mode preset. Customize the container shape, add obstacles, set your ball count, and adjust gravity sliders. Navigate to the Visuals tab to configure glowing trails and neon color cycles. Once you are satisfied with the real-time simulation, click 'Export Video' to render the file.

WebGL-rendered runs are calculated live in your browser for real-time previewing and editing. They are fast but their performance depends on your local hardware. A server-rendered export is processed on our dedicated cloud servers, rendering every physics step with mathematical precision and exporting a smooth, high-fidelity MP4 file with no watermarks.

Yes! Our platform supports a 'Multi-Simulation' layout on the Elite plan. This allows you to split the preview screen into a grid (e.g., 2x2 or 3x3) and run independent physics simulations side-by-side. You can synchronize them to play a multi-part harmony, creating a highly engaging compilation video.

Affordable. Earned back with a single video.

Pick the plan that matches your goals. Flexible subscriptions, cancel anytime.

Monthly
YearlySave up to 57%
Starter Studio
Everything you need to start.
Free
Forever
  • Connect YouTube
  • 2 videos per week
  • 1080p HD rendering
  • 5 exports per month
  • 100 MB storage
  • Community support
Popular
Pro Creator
The full creative suite.
$19/ month
  • Publish to 3 platforms
  • 6 posts per day
  • No watermark
  • 100 exports per month
  • Premium sound library
  • 1,000+ controls
  • Commercial license
  • 1 brand profile
  • 1 GB storage
  • Priority support
Trusted by daily creators
Secure checkout·Cancel anytime
Studio Elite
Built to scale across brands.
$99/ month
  • Everything in Pro
  • 3 brand accounts
  • 18 posts per day
  • 4K Ultra HD rendering
  • Unlimited exports
  • Custom watermark
  • Full preset library
  • 10 GB storage
  • Early access
Secure checkout·Cancel anytime

Every feature, side by side

Exactly what you get on each plan.

FeatureStarter StudioFreePro Creator$19 / monthStudio Elite$99 / month
Publishing & Scheduling
Connect YouTube
Connect TikTok
Connect Facebook
Posts per platform
2 / week
2 / day
2 / day
Posts per day, all platforms
2 / week
6
18
One-click cross-posting
Post scheduling
Rendering & Export
Render quality
1080p
1080p
4K
Exports per month
5
100
Unlimited
No watermark
Custom watermark
Creative Suite
Simulation controls
Limited
Full
Full
Premium sound engine
Ball effects
12
42
1,200+
Sound presets
12
50
310
Layouts & scene presets
Starter
Extended
Full
Account
Commercial license
Brand accounts
1
1
3
Cloud storage
100 MB
1 GB
10 GB
Early access
Support
Basic
Priority
Priority
Knowledge Base

Guides & Updates

Browse every help article and product update in one place.

Ready to Start?

Get instant access to the creator studio and start building Ball Simulator videos today.

Cookie Preferences

We use cookies that are necessary for the site to work, and, only with your consent, cookies for preferences, analytics and attribution. You can change or withdraw your choice at any time. Cookie Policy · Privacy Policy

Compliant with GDPR (EU), DPDPA (India), CCPA (California) and the ePrivacy Directive.